
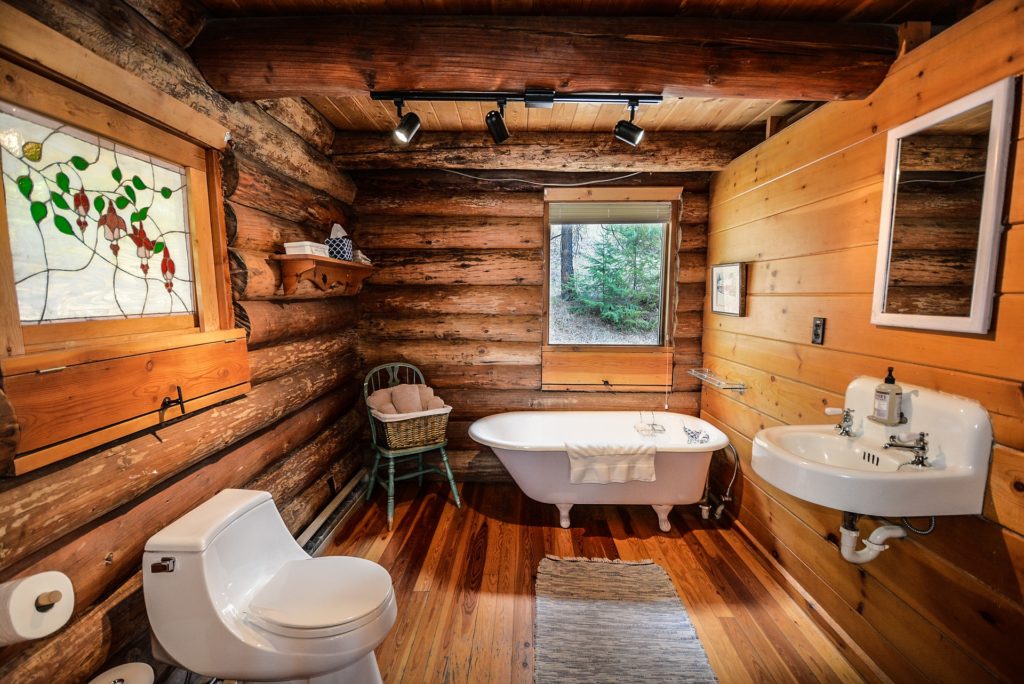
Good log cabin bathroom design comes down to five decisions: fixtures, space, DIY scope, moisture-tolerant materials, and ventilation. Get those five right and the room looks like it belongs in the cabin and still holds up to years of steam and temperature swings. Here is how to work through each one.
Whether you’re updating or starting new with your log cabin bathroom, it’s important to think about the details. What fixtures will you use? How much space do you have? What design will be the most efficient for your lifestyle? These are all important questions to consider when designing your log cabin. If you are still in the planning stage, our custom home design process is where bathroom layouts get locked in.
1 – Choose Fixtures That Fit Your Bathroom Design
From faucets and vanities to the bathtub, there are plenty of different fixtures to choose from. Fixtures set the tone for the whole bathroom design, so it is worth starting here.
The Sink and Vanity
- Vessel sink: Vessels are fixtures that sit on top of a counter or vanity so the entire bowl is visible. Installing a vessel sink on top of a slab of natural, uniquely shaped wood can add a whole new dimension to your bathroom wall.
- Pedestal or console sinks: Pedestal sinks are freestanding sinks, where as consoles stand on 2 to 4 legs. Neither involve a vanity, but the visible pipes (when matched with the rest of your room for consistency) can add further the rustic look you may be going for.
- Using different materials: Experiment with glass, metal, or other vanity and sink materials to add a unique twist to your bathroom. Maybe consider making the sink bowl itself out of wood or stone.
- Double it: If you’re working with a master bathroom, double sinks are always an option for efficient mornings.
The Bathtub and Shower
- Unique materials: Rather than the typical porcelain tub, try something using stone or wood to add a more natural feel to your room.
- Free-standing tubs: Bathtubs like these can boost any vintage bathroom design. Free-standing tubs are also often cheaper than other tub and shower options.
- Corner and alcove tubs: Each of these are pushed up directly against the wall and are often lined with tile on the outside, but there’s always the option to play with materials!
Faucets, Hardware, and Lighting
Fixtures get the attention, but hardware and lighting are what make a bathroom design feel finished.
- Finishes: Oil-rubbed bronze, matte black, and brushed nickel all sit well against log walls. Pick one finish and carry it through faucets, towel bars, hinges, and the shower valve so the room reads as intentional.
- Wall-mounted faucets: Mounting the faucet on the wall frees up counter space and shows off a stone or live-edge vanity top instead of hiding it behind a fixture.
- Layered lighting: Overhead light alone casts shadows. Add sconces at mirror height for grooming and a dimmable fixture for evenings. Warm bulbs around 2700K flatter wood tones; cool white makes logs look gray.
- Rated for damp locations: Any fixture inside the shower area needs a wet-location rating. It is a small detail that inspectors do check.
2 – Consider the Space You Actually Have
Ask yourself if both a bathtub and a shower is necessary. Is there any way you can combine the two? Regarding other elements, you may love the idea of a pedestal sink plus a free-standing vanity nearby, but ask yourself if there’s enough room for another addition to the room.
3 – Decide How Much of the Project You Can Do Yourself
A lot of money can be saved by going the DIY route. If there is any flooring, fixtures, or design elements you can install yourself, you could save quite a bit of money. However, don’t stretch your skills further than you are comfortable. It’s always best to have an experienced professional hook up things like electrical and plumbing.
4 – Pick Materials That Survive a Log Cabin Bathroom
A bathroom is the most humid room in the house, and a log cabin bathroom design has to respect that. Wood, stone, and tile all work beautifully here, but they behave differently once steam gets involved.
Sealed hardwood and reclaimed barn wood look right at home, though they need a moisture-rated finish and periodic resealing. Engineered wood and luxury vinyl plank mimic the look with far less movement. Natural stone and porcelain tile handle water best of all and pair well with log walls without fighting them for attention.
Whatever you choose for the floor, plan for a waterproof membrane under it. Retrofitting one later means tearing the room apart.
5 – Plan Ventilation Before Anything Else
Ventilation is the part of bathroom design people skip, and it is the part that causes the most expensive damage. Trapped moisture stains logs, feeds mold, and can eventually reach the structural timbers behind the finish.
Install an exhaust fan sized for the room and vent it outside, never into an attic or crawlspace. The U.S. Department of Energy recommends spot ventilation in bathrooms for exactly this reason, and the EPA notes that controlling indoor moisture is the single most effective way to prevent mold growth.
Run the fan during every shower and for twenty minutes afterward. It is the cheapest insurance in the whole project.
What a Log Cabin Bathroom Design Costs
Bathroom design costs swing widely, but a few patterns hold. Fixtures and finishes are where budgets are usually won or lost, not the framing.
A straightforward refresh with a new vanity, faucet, toilet, lighting, and paint often lands in the low thousands. A full remodel that moves plumbing, adds a walk-in shower, and uses stone or custom woodwork climbs quickly from there. Building a bathroom into a new cabin is generally cheaper per square foot than reworking an existing one, because nothing has to be demolished first and the plumbing runs can be planned instead of retrofitted.
Three line items surprise people most often: moving a drain, upgrading the electrical panel for heated floors, and the cost of matching new logwork to weathered existing logs. Ask about all three before you settle on a bathroom design budget.
If you are deciding between a remodel and a new build, it helps to price both. The gap is often smaller than expected once hidden repair work is included.
Log Cabin Bathroom Design FAQs
Can you put a real wood floor in a log cabin bathroom?
Yes, with a moisture-rated finish, a waterproof membrane underneath, and good ventilation. Many owners choose engineered wood or tile that looks like wood to get the same warmth with less risk.
How much space does a log cabin bathroom need?
A comfortable full bath usually starts around 40 square feet, and a half bath can work in 18 to 20. Tight cabins often do better with a combined tub and shower than with both as separate fixtures.
What is the most common bathroom design mistake in a log home?
Undersized or improperly vented exhaust fans. Everything else is cosmetic and fixable. Moisture damage behind log walls is neither.
Should the bathroom have log walls or drywall?
Either works. Log walls keep the cabin feel consistent but need a durable sealed finish and reliable ventilation. Drywall or tile in the wet zone, with logs elsewhere in the room, is a common compromise.
Is a log cabin bathroom remodel a good DIY project?
Partly. Demolition, painting, tile, and fixture swaps are realistic for a confident DIYer. Plumbing rough-in, electrical, and ventilation ducting are worth handing to a licensed pro.
No matter your vision, Frontier Log Homes can help the process get started with one of our log cabin kits. Contact us at 970-249-7130.