
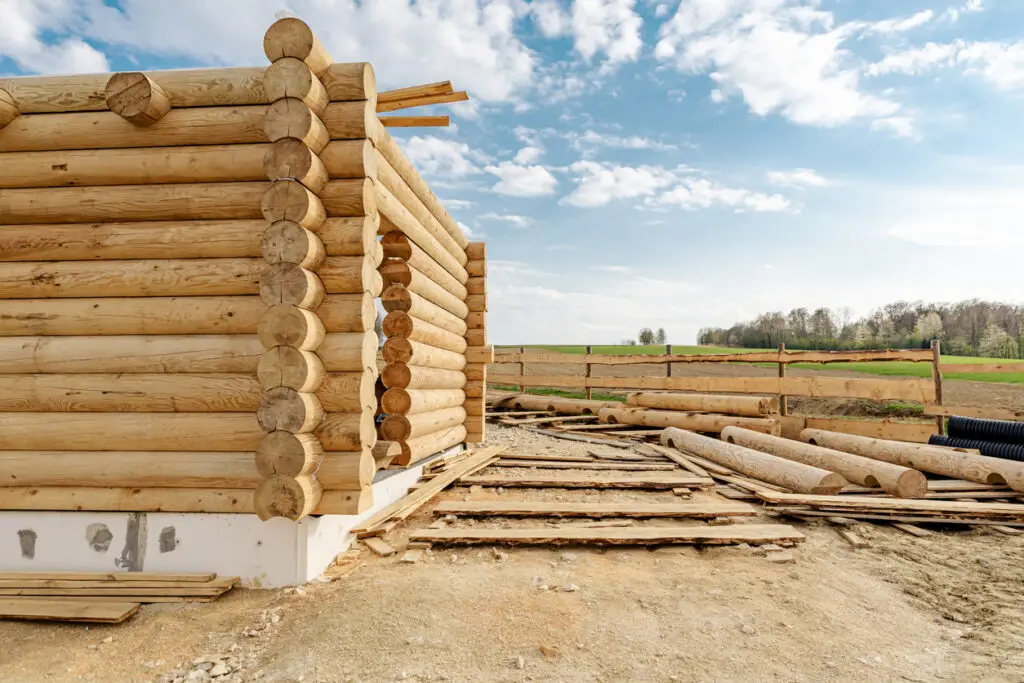
To build a log home you buy the land first, confirm what the site will physically allow, then design the house around that site before anyone orders a log. Most people researching how to build a log home start with floor plans. Starting there is the single most expensive mistake a landowner can make.
We have built log and timber homes on the Western Slope of Colorado since 1977. Steep ground, deep snow, roads that close, lots a concrete truck cannot reach. The steps below are the sequence we actually follow, and the reasons behind each one.
How to build a log home in 9 steps
- Secure the land and verify it can be built on. Access, water, septic, power, zoning, setbacks.
- Set a working budget and confirm financing. Construction lending for log homes is its own category.
- Design the house to the site. Not a stock plan forced onto the lot.
- Engineer the structure. Snow, wind, seismic, soils.
- Permit the project. Building department, driveway permit, well permit, septic permit.
- Prepare the site. Road, pad, utilities, staging area for the log package.
- Build the foundation. Sized to the real soil report, not an assumption.
- Set the log shell and dry it in. Logs, roof, windows, doors, weather-tight.
- Finish the interior and close out. Mechanical, electrical, plumbing, finishes, certificate of occupancy.
Most people ask about step 8 first. Step 1 is where the money is won or lost.
Step 1: Buy land you can actually build on
A cheap lot is rarely cheap. Price per acre tells you almost nothing about what it costs to build a log home on it.
Before you close, get answers on five things:
- Legal and physical access. A recorded easement is not the same as a road a loaded truck can climb. Grade, width, and turning radius all matter. Log packages arrive on long trailers.
- Water. Well permit availability, expected depth, and whether neighboring wells produce.
- Wastewater. Percolation and soil conditions decide whether you get a conventional septic system or an engineered one.
- Power. Distance to the nearest pole. Long line extensions and off-grid systems are both real options, and they price very differently.
- Zoning and covenants. Setbacks, height limits, building envelopes, and architectural review.
Slope deserves its own look. A grade that reads as “a nice view lot” can add retaining walls, deeper foundations, longer utility runs, and a switchback driveway. Our guide on sloped lots versus flat lots covers the checks worth running before you sign.
If the property sits in the wildland-urban interface, defensible space work around the house is part of the build, not an afterthought. The Colorado State Forest Service publishes free Home Ignition Zone checklists that tell you exactly what has to be cleared and where.
Step 2: Set the budget before the drawings
Design to a number. A set of plans drawn without a budget produces a house you cannot afford to build, and redrawing it costs real money.
Three things move the cost to build a log home more than square footage does:
- Site difficulty. Access, slope, soils, and utility distance.
- Roof and wall complexity. Every valley, dormer, and change of plane adds labor and adds risk.
- Finish level. The same shell can be finished three ways and land at three very different totals.
Our breakdown of what a log home costs walks through the line items. For lending, these projects are usually financed as construction-to-permanent loans, and appraisers treat them differently from stick-built houses. Log home financing options covers how that works.
Step 3: Design the house to the site
This is the step that separates a log home that works from one that fights its own lot for fifty years. Design to the land and you build a log home that belongs there. Force a stock plan onto the site and you pay for the mismatch every year you own it.
Site-driven design means the plan responds to real conditions: where the sun comes from in January, where snow sheds off the roof, where the driveway can reasonably land, which windows carry the view and which ones only lose heat. Orientation is free at the drawing stage and impossible to change later.
It also means the plan is drawn for logs. Log walls are structural, they move, and they carry loads differently from framed walls. A plan drawn for conventional framing usually has to be redrawn.
This is where a custom home design engagement earns its fee. You get a floor plan, elevations, and a structure a builder can price accurately, before you commit to construction.
Choosing the wall system
The wall system decides the look, the detailing, and a good share of the labor.
| System | What it is | Best suited to |
|---|---|---|
| Handcrafted full-round | Full-diameter logs, scribed and fitted individually by hand | Owners who want the traditional heavy-timber look and the largest log profiles |
| Milled log | Logs machined to a uniform profile before delivery | Consistent coursing and a more uniform appearance |
| Timber frame | Exposed post-and-beam skeleton with enclosed wall panels | Higher wall insulation values with exposed structural timbers inside |
| Hybrid | Log or timber elements combined with conventionally framed sections | Getting the log look where it shows and modern wall performance where it does not |
Species choice matters too, and it is not only aesthetics. The best wood for a log home compares the species we work with, along with how each one behaves in a wall over time.
Step 4: Engineer it, then permit it
Anyone working out how to build a log home in the mountains has to engineer for snow load, wind, and the soil conditions specific to that site. Those loads are set by your county and by the geotechnical report on your lot. Do not accept numbers carried over from another project.
Permitting typically runs on several parallel tracks: the building permit, the driveway or access permit, the well permit, and the septic permit. They move at different speeds and some depend on each other. Our overview of building codes for log homes explains where the friction usually shows up.
One log-specific detail worth knowing early: log walls settle as the logs give up moisture and the courses compress. Good detailing plans for that movement at every window, door, stair, and interior partition. How log homes settle explains what that looks like when it is done right.
Step 5: Site work and foundation
Site work comes before the logs arrive, and it is bigger than most people expect the first time they build a log home. Driveway, building pad, drainage, utility trenching, and a flat staging area where the log package can be unloaded and sorted.
That staging area is not optional. A log shell goes up in a strict sequence, and the crane needs the right logs within reach in the right order.
Foundation type follows the soil report and the slope. Full basement, crawl space, and slab each behave differently on mountain ground. Foundation types for log homes covers the tradeoffs, and the full sequence is in our site preparation guide.
Step 6: Set the shell and dry it in
The log shell goes up fast compared to everything around it. That speed is deceptive, because everything before it took months.
Dry-in means the structure is weather-tight: logs set, roof on, windows and doors installed. From that point interior work continues regardless of weather, which matters a great deal at elevation where the outdoor season is short.
Roof design carries more weight here than on a conventional house, because deep overhangs are what keep water off the log walls. Snow-shedding geometry and roof material should be settled in design, not on site.
Insulation is where these homes are most often misunderstood. Solid wood has real thermal mass, which behaves differently from a rated R-value, and the roof and floor assemblies do most of the heavy lifting on the overall envelope. Build a log home with a tight roof and a tight floor and the walls take care of themselves.
Step 7: Finish out and close
Mechanical, electrical, and plumbing all get routed with settling in mind. Interior finishes, cabinetry, stairs, and railings follow. The county inspects through the process and issues a certificate of occupancy at the end.
You do not have to buy the whole thing as one scope. Two common structures:
- Dry-in package — we deliver a weather-tight shell and you carry the interior with your own subcontractors.
- Turn-key — one contract, one point of accountability, keys at the end.
What makes mountain builds different
To build a log home at elevation is not the same job as building on flat ground with a paved road to the pad.
Season length is the first constraint. Concrete, excavation, and log setting all have weather windows, and missing one can push a project a long way.
Access is the second. We have staged builds where material had to be flown in because no road could reach the site. That capability is unusual, and it is the reason some mountain lots are buildable at all.
Water and power are the third. A site without a utility pole nearby is not unbuildable, but the choice between a line extension and an off-grid system belongs in the design phase, not after the foundation is poured.
You can see the range of terrain we have worked on in the project gallery.
Frequently asked questions
Can I build a log home myself?
Parts of it, yes. Many owners handle interior finish work, painting, flooring, or landscaping. The log shell itself requires a crane, trained crews, and joinery experience, and the structural and permitting work has to be done by licensed professionals. Owners who want to build a log home with their own labor most often succeed by buying a dry-in package and finishing the interior themselves.
Do I need an architect to build a log home?
Not always. Many of these houses are drawn by designers who specialize in log construction and stamped by a structural engineer. What you always need is a plan drawn specifically for log walls and engineered for your site’s actual loads.
How long does it take to build a log home?
It depends on the site, the season, the permitting jurisdiction, and the scope. Access difficulty and weather windows drive the schedule more than square footage does. We give a realistic schedule once we have seen the property and know what the county requires.
Is a log home more expensive than a conventional house?
Comparable in many cases, and the differences rarely come from the logs. Site difficulty, roof complexity, and finish level move the number far more. A remote mountain lot costs more to build on regardless of what the walls are made of.
Where should the logs come from?
Species and grade matter more than geography. What matters most is that the logs are properly dried, graded, and handled before they go into a wall. Green logs installed without allowing for movement create problems that show up years later.
What is the first step to build a log home?
If you own land, get a site assessment. If you are shopping for land, have someone who builds on mountain ground look at it before you close. Either conversation costs far less than discovering a problem after you own the lot.
Start with your land
Everything we have built since 1977 started the same way: understand the site, then design to it. That order is why the projects finish.
If you own land or are about to buy it, we will tell you straight what it will and will not allow. Call (970) 249-7130 or use the contact form.
Let’s design a log home that fits your land, budget, and lifestyle. That is exactly how to build a log home that still works fifty years from now — see how our custom log home process works.